NOTICE: These are tech pages explaining how I did these mods to my bike. In almost every case - |
Wire an Electric Jacket or Liner for heat and to Power Elect Gloves Thanks to Steve Quiat, Whit Brown, Jason Sherman and Mike Coan for their contributions
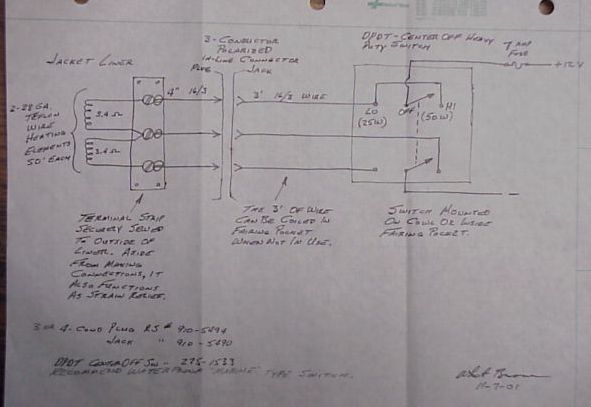
Rationale I've been meaning to do this for awhile. I've been using Widder gloves for years, and man when the temp gets below 40 and you have miles to go, just about nothing is as nice as warm hands. Except maybe warm arms, shoulders, back and johnson. (OK I didn't put heater wires THERE, just checking if you're paying attention) Maybe you've heard the saying - there's no bad weather, just bad gear. I'm SO tickled now, I can ride in ANY amount of cold as long as there's no ice & snow. And I don't have to use up my bags with layers of sweatshirts. Cost Depends on your ambition and your pockets. I spent more than I had to by buying a controller instead of making one. Well I wanted to support the guy who makes them and it didn't cost a lot - more on that later. $175 including $100 for the controller and I didn't try to cut corners. Time All day. I wasn't in a hurry and the olympics were on TV. Materials Tools I used Process I reviewed several write-ups on the subject that I found via google, and the article Steve sent me that Whit wrote - the latter was particularly helpful. Basically what this amounts to, is using light gauge wire in a deliberate short circuit, paying careful attention to the gauge, length and resistance of the wire, so we plan the watts it will consume as it tries to pass all the current it can and inevitably heats up. The choice of wire is thus very important. We need it to be insulated so we don't get unplanned short circuits, and the insulation needs to be very heat resistant. We need it to be multi-stranded so it doesn't fatigue and break from flexing - the more strands the better. We need consistent quality in the wire so impedance is constant (no one place has too high impedance and heats up too much) and predictable. Whit's recommendation is perfect. mil-spec 28ga 19/40 stranded silver plated copper with teflon coating. The teflon is good to 392° f and is slippery which enables sewing with it, and the high strand count makes it very durable in a flex application, while the mil-spec ensures uniformity. Whit had written up a great article on this subject, and had determined this wire meters at 0.068ohms / ft. He wired his so he could select via a switch, to run power through 100 ft of this wire yielding 6.8ohms, at 13 volts that results in 1.85 amps and 25 watts. Running the current through only 50 ft halves the resistance to 3.4ohms and yields 3.7amps and 50 watts assuming 13 volts. There's an ohm's law calculator at http://ourworld.compuserve.com/homepages/Bill_Bowden/ohmslaw.htm
I decided I wanted to shoot for a little extra capacity since I planned to throttle it down anyway
with the digital control. The clothing makers typically make their jackets around 50-70watts. I got 85watts assuming 13 volts (meters at 2.0-2.1ohms) by using 2-57ft lengths of wire, each
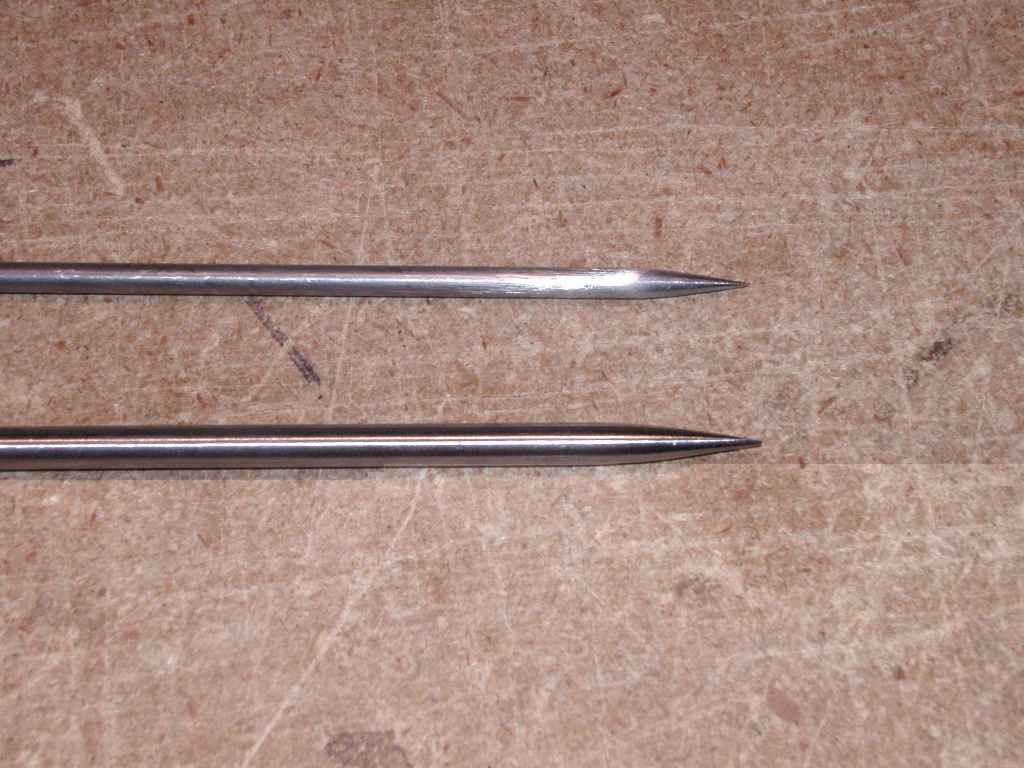
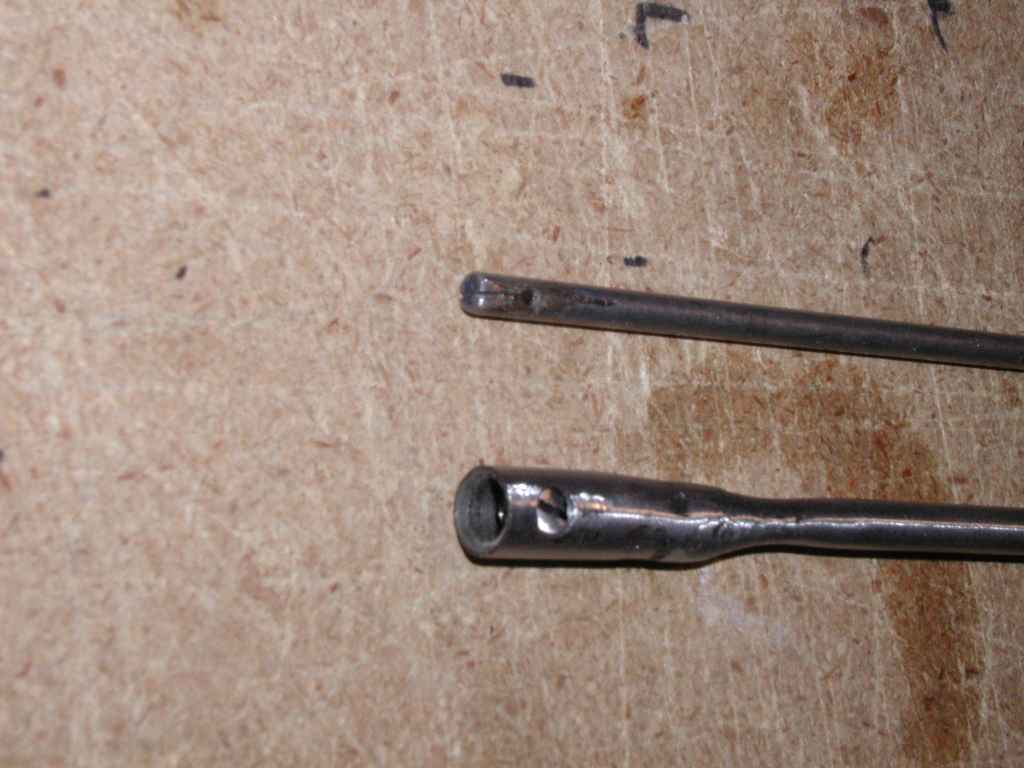
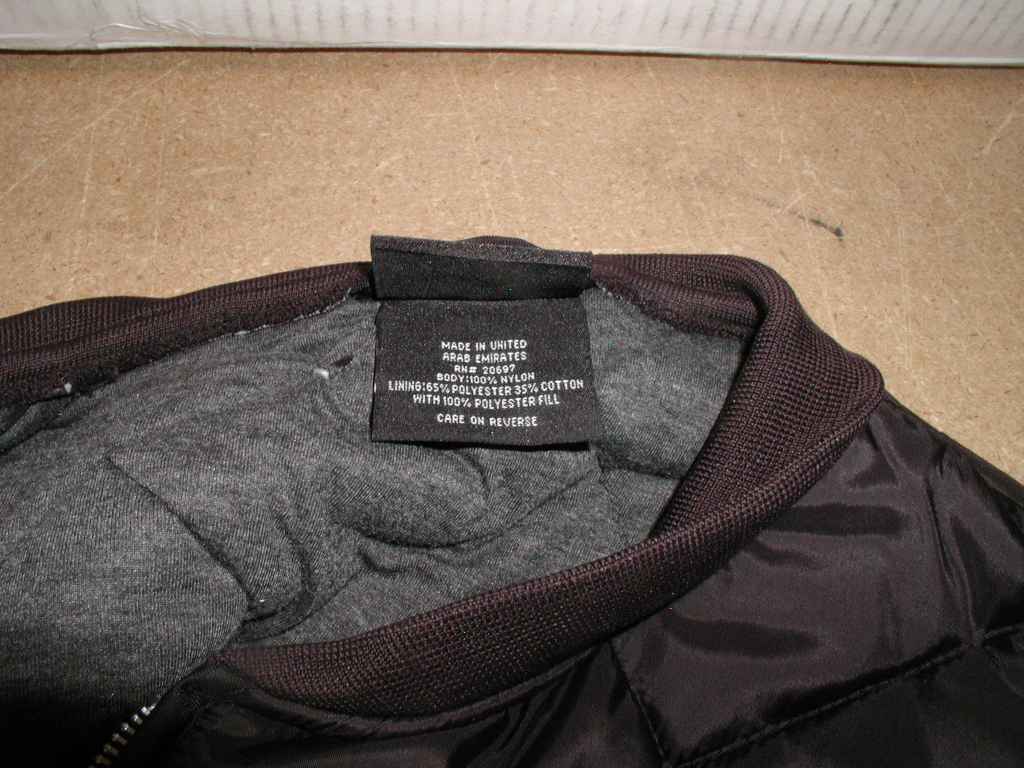
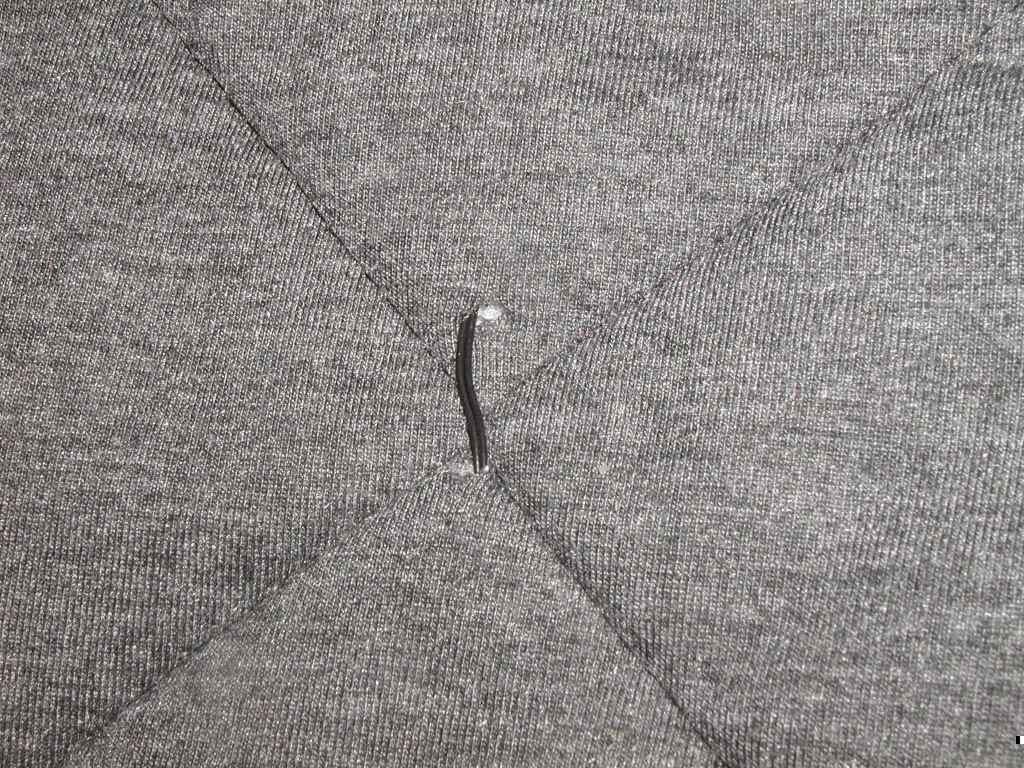
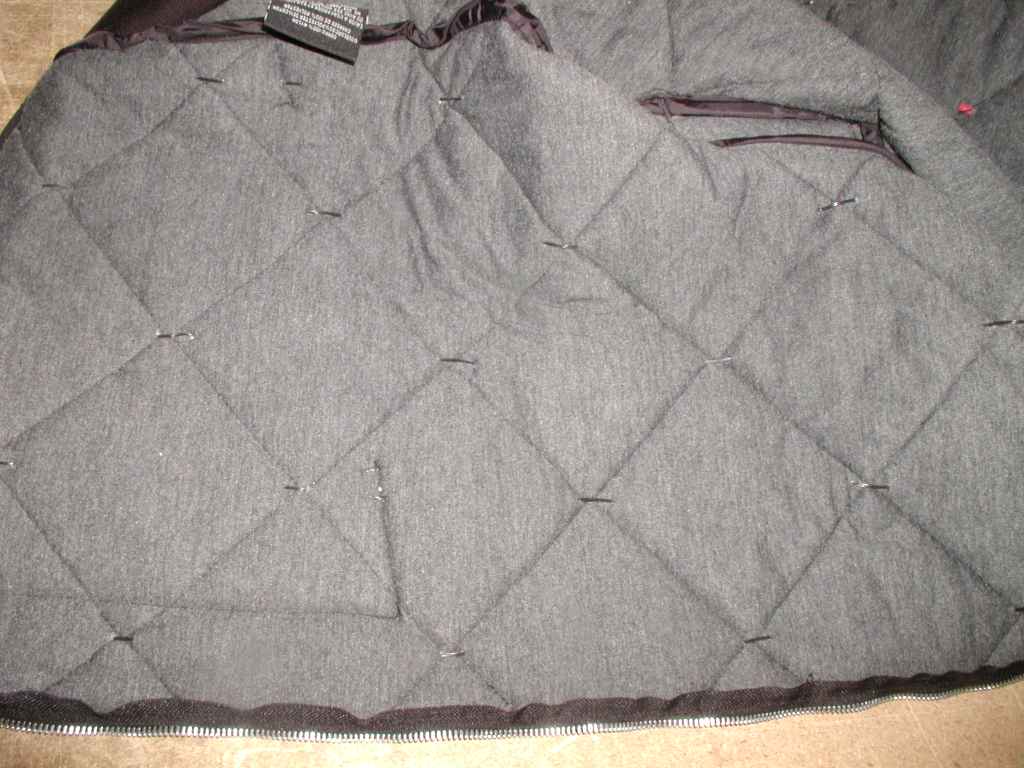
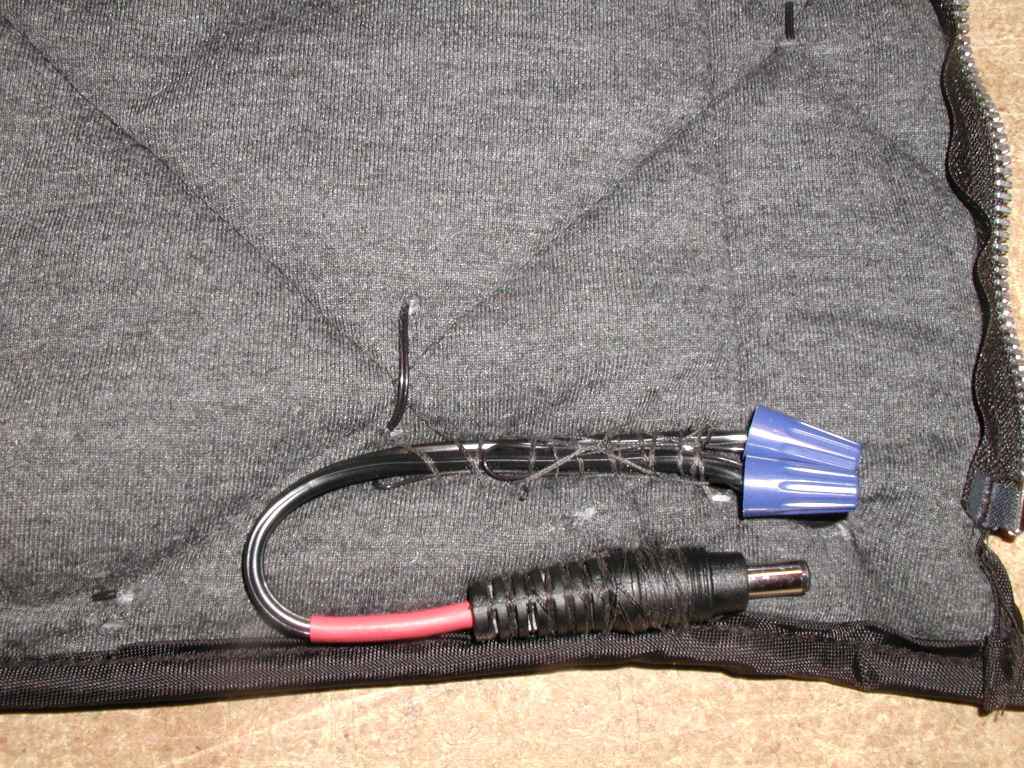
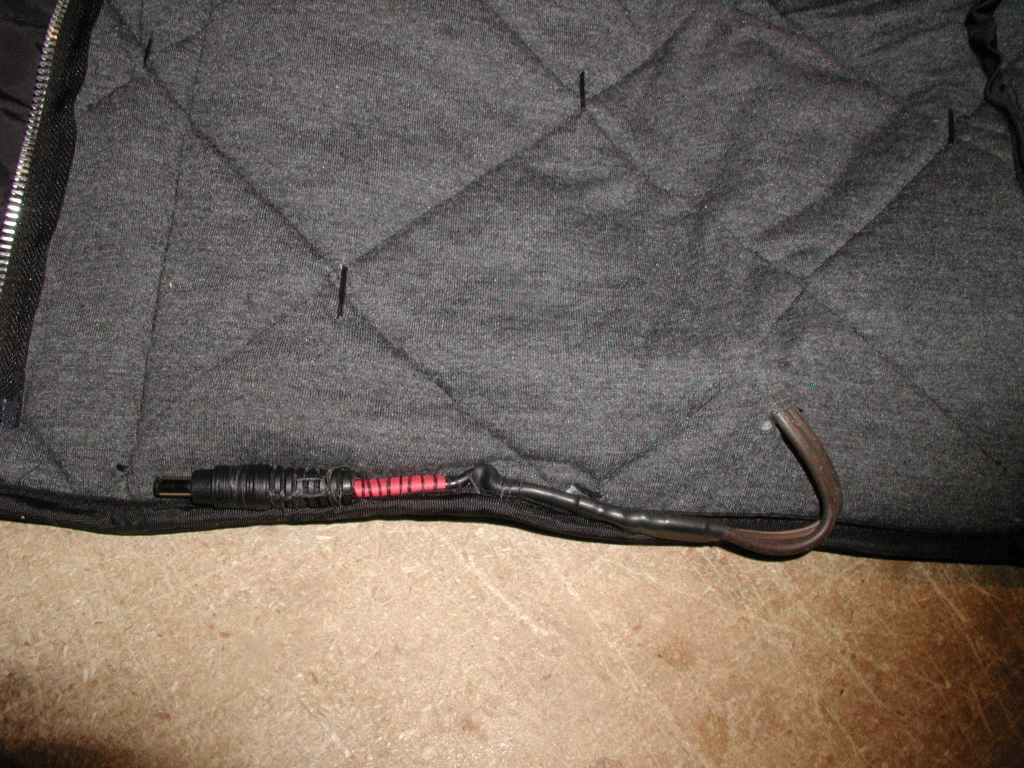
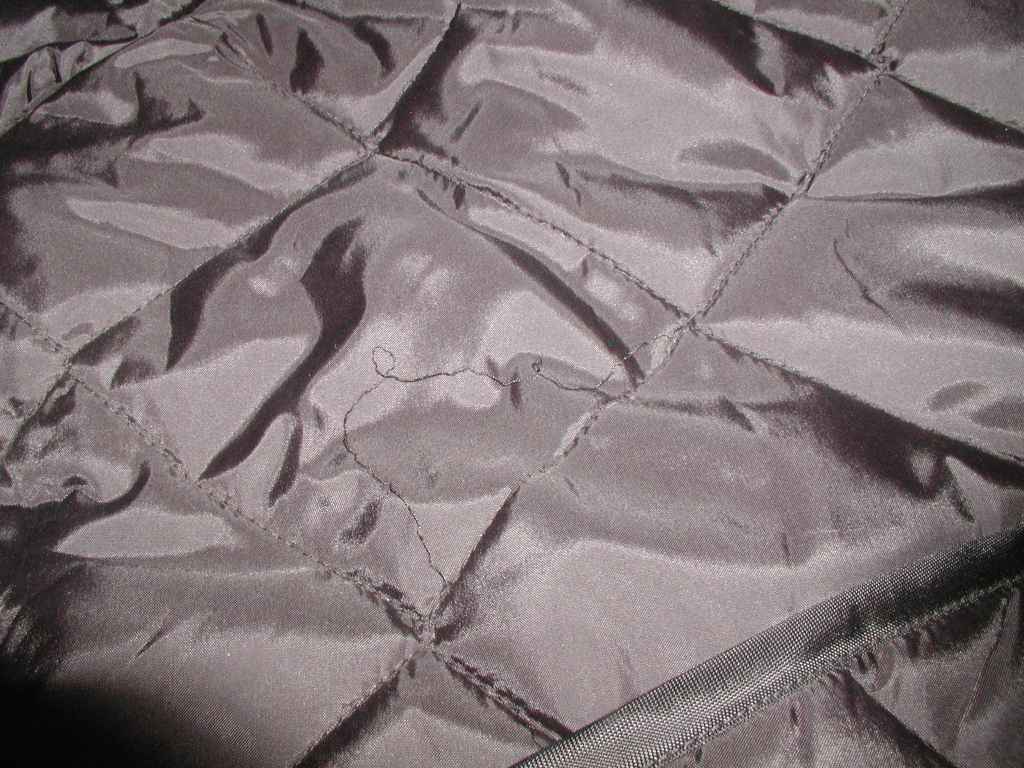
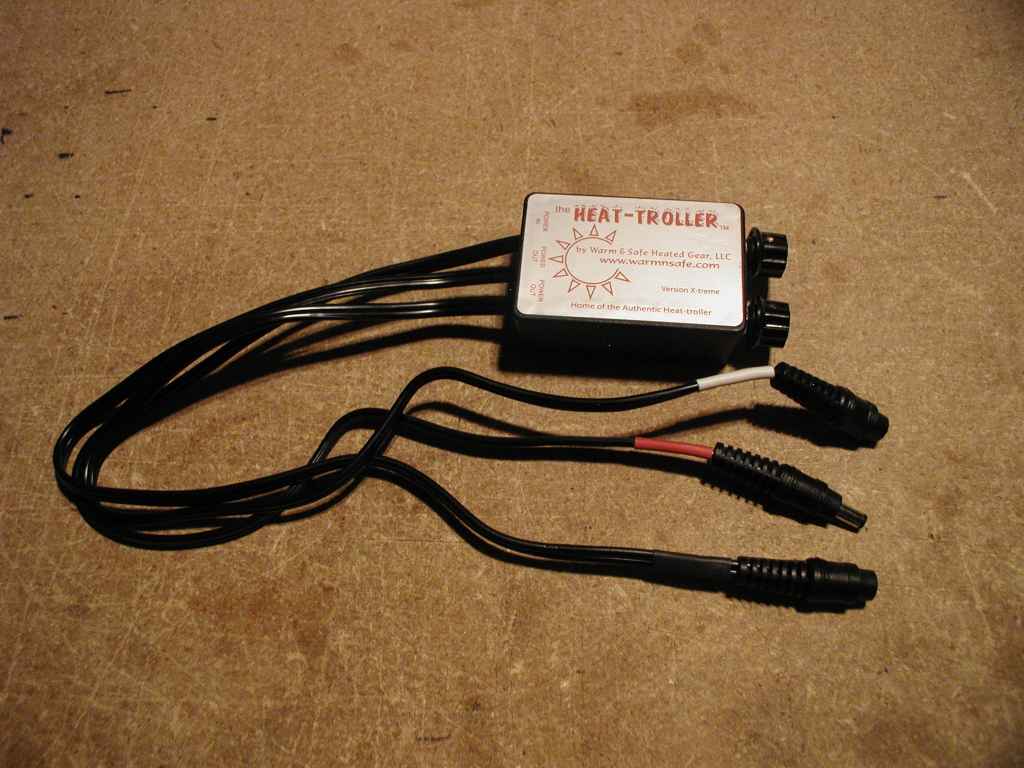
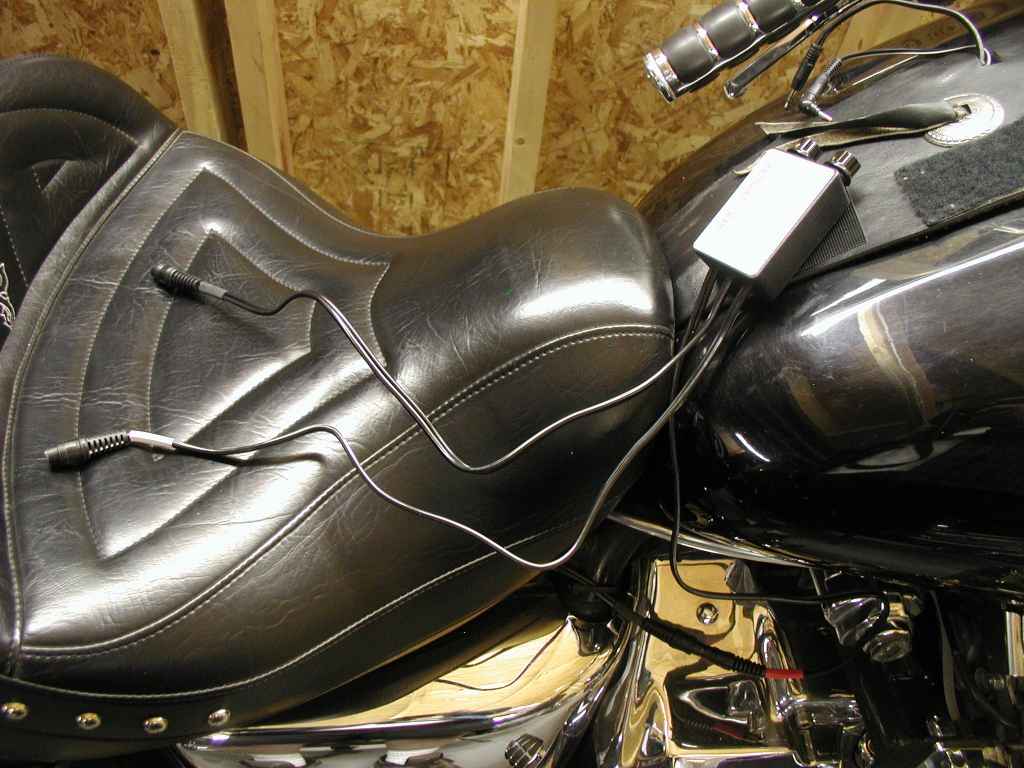
meters at 3.8 ohms, connected in parallel. You need a pleated jacket to help hold the wires from moving around. The wires need to be run just inside the lining, inside any insulation (The Dickies jacket - made in Egypt - has polyester fill). I discovered it is best to NOT break the quilting stitches but to poke the big needle through the inner lining, go around the stitching, then poke it back inside the lining. I found out the hard way that if you just ram it through the stitches, the pleating will unravel. I made two giant needles out of steel dowel - one is 3/16" diameter, the other 1/4". I used the bigger one to route heavy wire (extension cord) from the input plug on the right side bottom of the jacket, to the plugs at the end of the sleeves, for the gloves. Unfortunately I pushed it through the pleat stitches and they are unravelling. Well I found out that was a mistake, you can avoid. Now I would just route it on the inside of the jacket and stitch it in place every 4 inches or so. Figure out the watts you want, use the above calculator to determine what length wire will produce that at the rate of .068ohms/ft, and use the pleats of your jacket to carefully route the wire evenly so you run out of wire when you run out of area to heat. Jason mentioned in his article that it's best to avoid heating your shoulder blades as they are bony and the heat conducts too easily there, whereas you do want plenty of heat on your kidney area. Remember adding wire in series increases the impedance and thus a longer wire will use less watts and produce less heat, while wires in parallel will lower impedance, increasing power use and heat. On the heat control - I bought mine at http://www.warmnsafe.com. This company made the heat control for Gerbing - until Gerbing got tired of paying their price and reverse-engineered the controller to get the schematic, then outsourced it to China, thereby ripping off Mike's intellectual property, knowing he didn't have the resources to sue them. I've had my TromBones patent infringed by 2 Dutch companies - it turns out having a patent and enforcing it are two different things - my lawyers want a quarter-mil retainer to go after them. He who has the most bucks wins. Anyway, I'm really pleased with the controller and the coax connectors I got from Mike, and his customer service is Johnny-on-the-spot. The big needles - they need to be sharp and smooth. I ground the profile of the point against the side of my chop saw, but any power grinder or sander would work. Then I smoothed the profile with my 1" belt sander (no platen), and smoothed the surface so it would slide easily through the fabric, by turning it against the cloth side of the sanding belt. I drilled the needle eye with a small drill and put a couple grooves from the eye to the end with a dremel cutter wheel. You use it just like a sewing needle - the wire is run through the garment double thick, so the current will go out and back in series. I made the bigger needle with the hollow end and the set screw to route the extension cord - that wasn't the best plan, just stitching it inside the garment would be better. If you use switches to select the wires to use them in parallel rather than series, it will double the power and heat. As for me, I wanted it simple and just bought the controller. I wired mine so the current for the jacket is connected on the bottom hem left side. From there it splits to two circuits. One goes up and down on every pleat on the front, then routes into the sleeve, goes down to the wrist on the inside, up, down, and back up with 3 lines covering the inside and top and one on the back. This seems to work well. Then the circuit covers the left half of the back except the shoulder blade, and covers up the spine to the collar. The other circuit goes around the bottom hem to the right back, covers the lower back only, then does the right sleeve in the same manner as the left, then the right front is last in the same manner as the left. Here's some pictures I took, mostly self-explanatory, all link to enlargements:
Here's the Article Whit Brown wrote: HOME BREWING A HEATED LINER - V1.1
Use Because we routed the wires so they are exposed in places on the inside, you'll want to wear a long sleeve T shirt under it so the wires aren't directly against skin. It doesn't help to pile on other layers, as you're then asking the heat to come through that as well. What would help, if it gets absolutely sub-arctic out there, is to add a layer OUTSIDE the jacket - that is, use the jacket as a liner inside another jacket. This light electric jacket works fine down into the lower 20's on my Wing and my Valk - both with shields - with absolutely no chill experienced. I haven't tested it below that yet, but I'm about to wire the liner in my Belstaff jacket - which without added heat, is already good to below freezing. Conclusion Man, does this baby heat! I LOVE it! NOW I don't care if it's below freezing! OK, I also have a balaclava since I don't prefer full face helmets. And my legs don't get cold anyway, kinda hairy and that traps warm air next to the skin (I know, TMI). OK I ride a Valkyrie with Baker Wings, and also a GL1800 Gold Wing with Baker Wings, so I don't have a lot of air on my legs anyway. NOW I'm going to look into wiring my own electric gloves, the Widders are too bulky and I don't support companies that rip off inventions just because they can...
|

All technical mods described here are merely reports of what I've done. You may attempt to replicate them at your own discretion and risk if you choose. Horseapple Ranch, LLC and Mark Tobias will in no way be responsible for the results of your attempting to perform these mods on any motorcycle, regardless of the outcome.
All content on www.horseapple.com copyright 1999-2006 Mark Tobias except "Riders Say", "Dyno Day", Vallejo and Shop Manual and Alternator Review pages, and SWF and MP-3 files and
their graphic icons, and any content specifically attributed to another author.
All rights reserved.