Fork Bag with Fender Clearance
Rationale
Fork bags look nice. Very classic look, every shovelhead has one. Stick one on the Valkyrie and hit a bump and you'll be SORRRRRY.
Nice dent in the fender. At the least, damaged paint. There isn't enough clearance between the headlight, windshield and fender for a
fork bag of useful size, somethings gotta give and it's the expensive fender.How to install one anyway? The easiest clearance increase is moving
the headlight, trimming the shield and tipping it. With the bike on a lift, full travel of the fender is 4 1/8" up - that's the bottom limit of where the bag ends.
Cost
Under $10 at Ace hardware, if you already have tools and the fork bag.
Time
Materials
- 3-6 X 35MM hex bolts
- 3-1" spacers
- 2- heavy duty wire ties
- 2-1/8" X 1" X 2" aluminum or stainless bar stock
- 2-6X10mm bolts, nuts, and washers
Tools
- metric socket set
- phillips screwdriver
- drill and bits, punch, hammer
- bench vise
- measuring device like a dial caliper
- masking tape, fine tip marker
- windshield cutting tools - I used an air body saw, die grinder with carbide burr, and a file. A sawzall works, so do hand tools.
- Dremel
Process
The 3 bolts that secure the headlight shell are conveniently at an angle - so if you move the headlight by using longer bolts with spacers
under them, the headlight will move up and out. Convenient! That eliminates the problem of having to move the instruments too.
But first, if you have a windshield and it's close to the headlight, you will have to move it. Here's another great reason to tip the
windshield! Go to that link, and tip the windshield first. Or I'll just tell you here, you need to make two straps with holes 1 inch on center, to
move the bottom Hondaline windshield mount forward. This moves the headlight cutout up (and the top of the shield down and back). OK, so now your shield has more space above the headlight. Now go ahead and replace the existing bolts inside with the 35mm ones and the spacers. You need to make some room under your Hondaline windshield for the bag. (If it's not Hondaline, probably not, I think this is the only
one that wraps around the headlight). I covered the bottom with masking tape, marked out the cuts I needed to do with a T-square/straightedge, and cut it with an air body saw. Finished with
a carbide burr in a die grinder, and a file. Didn't need to sand since it came out pretty smooth and it's on the bottom. Sorry, I lost the pictures.
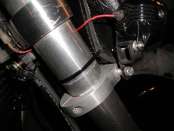
OK, so now just fasten the bag on using it's straps to what's convenient, and the wire ties. I used the lower Hondaline windshield mount bar, with the bottom of the bag snugged against my Rifle billet
clamps that hold my mini spots, and the wire ties pulling the bag tight against the forks. I had cut holes for the wire ties with a 56,000rpm
air mini die grinder with mini burr, but a Dremel will work just as well. Or a drill, albeit slower.   
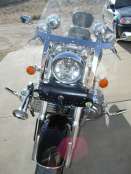
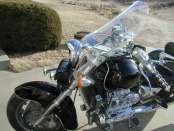
Notice the headlight looks custom sticking out like it does.
|
